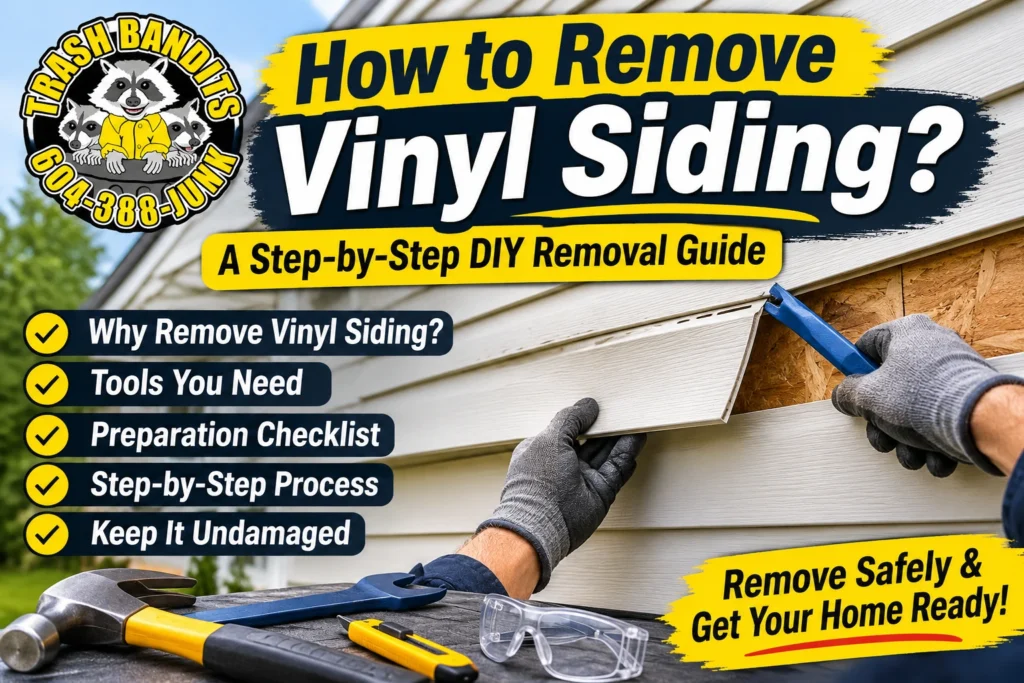
Tackling the removal of old, cracked, or damaged siding may seem more challenging than anticipated. The panels overlap and interlock with each other, so it’s important to pull them away gently so as not to crack or damage the wall underneath. It’s also important to take a look at what might be going on inside.
This vinyl siding removal guide explains how to remove vinyl siding in the correct order, which tools to prepare, and what to inspect once the panels are off. You will also find out how to safeguard reusables and handle the renovation waste created afterwards. If hazardous materials have been seen, do not disturb the materials and shut down the work until they have been professionally evaluated.
Why Would You Need to Remove Vinyl Siding?
Exterior walls are protected by vinyl siding, but it can become affected by the ageing process and moisture. One or more sections or walls may need to be removed to complete repairs.
Common reasons include:
- Replacing damaged or cracked siding: Storms, impacts and temperature changes can cause damage and cracking.
- Repairing moisture damage: Moisture damage can be caused by seams that are damaged or openings that are not sealed tight, causing moisture to penetrate the materials below.
- Installing new siding: If the exterior finish is already installed, it may be necessary to remove it before installing a new product.
- Accessing wall sheathing and house wrap: Contractors may require access for inspection of the wall, to fix the rot or to replace a damaged house wrap.
It is not sufficient to remove siding to solve all the problems. Determine the leak or problem area before re-covering the wall.
What Tools Do You Need to Remove Vinyl Siding?
Prepare a vinyl siding removal tools list before starting. Having the correct equipment makes the work easier and reduces the risk of breaking panels.
- Vinyl siding removal tool (zip tool): This is a small tool used to unclip the bottom locking fitter of a panel. A zip tool for vinyl siding is especially useful when separating overlapping sections.
- Pry bar: Use to untrim and pop out firm fasteners. Be careful not to damage the wall while using it.
- Utility knife: This can be used to cut some sealants or materials around trim. Never cut without looking behind panels.
- Hammer and nail puller: Remove nails and other fasteners.
- Safety gloves and protective eyewear: Wear safety gloves & protective eyewear to prevent sharp edges, nails, and debris from flying into your eyes & hands.
This vinyl siding removal tools list contains basic tools for regular vinyl siding. Extra equipment may be required for high walls or hard-to-access areas. Never use an unstable ladder.
How to Prepare for Vinyl Siding Removal:
A little preparation can prevent unnecessary damage and delays. Use this vinyl siding removal checklist before touching the panels.
- Inspect the exterior walls: Check loose parts, cracks, water stains and broken trim. Decide on the area to be cut.
- Check the weather: Make sure it’s a dry, windless day. The cold weather can cause vinyl to become brittle, allowing panels to be more easily cracked. Avoid forcing cold panels.
- Protect nearby areas: Relocate outdoor furniture and cover sensitive landscaping. Keep windows and doors protected from falling debris.
- Understand the panel design: Vinyl siding has panels that overlap with interlocking edges. One panel snaps to the other panel at the bottom of one panel and at the top of the other panel.
How to Remove Vinyl Siding Step by Step:
The correct process for how to remove vinyl siding is to release the panels first and remove their fasteners second. Work carefully so you do not bend or crack sections you may want to reuse.
Step 1: Locate the Starting Point
Beginning at an easily accessible side edge or at the bottom of the segment to be removed. Look at the overlap of the panels and mark seams. When removing an entire wall, make a plan before you start removing the wall.
Step 2: Use a Vinyl Siding Removal Tool:
Move the zip tool under the bottom border of the tab above the part you wish to remove. Gently run it along the seam until the locking lip comes off. Do not force the tool or pull the panel outwards.
Step 3: Separate the Interlocking Panels:
With the bottom edge unlocked, slowly remove the panel from the wall, being careful not to damage it, so it can be accessed by the fasteners. Continue along the length of the panel. Be careful not to bend it too sharply.
Step 4: Remove the Nails:
Vinyl siding is typically fastened on top of the siding using the slots. Remove fasteners with a nail puller or as appropriate. Do not tear the slots, as torn nail holes can make it more difficult to reinstall a panel.
Step 5: Remove Each Panel Carefully:
Once the nails are removed, take down the panel and put it on a surface. Follow around the wall, keeping the removed sections organised. If you want to remove just one section, unfasten the vinyl siding above the section you want to remove before attempting to pull the section you want to remove up.
Step 6: Remove Trim and Channels if Needed:
J-channels, corner posts, and other trim may need to come off if the renovation requires access behind them. Check how each piece is fastened before removing it. Around windows, take extra care with flashing and sealant. If you are learning how to remove vinyl siding around a window, avoid cutting or pulling materials that form part of the window’s water barrier.
How to Remove Vinyl Siding Without Damaging It
The best way to remove vinyl siding is to release its locking edges and fasteners instead of forcing the panels away from the wall. Work slowly and support longer sections as you lower them.
Keep these points in mind:
- Avoid working in very cold conditions when panels are more brittle.
- Do not bend panels sharply or drag them across rough surfaces.
- Remove every fastener before pulling a panel free.
- Label panels by wall and position if you plan to reinstall them.
- Stop if a section will not release easily. Check for hidden fasteners or trim.
These steps are useful when you want to take down vinyl siding for repairs and keep as much material intact as possible.
What to Check Behind Vinyl Siding After Removal
Once the wall is exposed, inspect it before installing replacement siding. Check the house wrap for tears, gaps, and loose sections. Look for water stains, damp insulation, mould-like growth, or signs of leaks. Examine the wall sheathing for soft spots, swelling, rot, or deterioration.
Also inspect flashing around windows, doors, and other openings. These areas help direct water away from the wall. Repair the source of any moisture before covering the surface again. If you find extensive damage, have a qualified contractor assess the wall.
Can You Reuse Vinyl Siding After Removing It?
Yes, some panels can be reused if they remain straight, clean, and free from cracks. Check the locking edges and nail slots. Panels with broken seams, severe fading, or brittle sections may not hold securely after reinstallation.
Store reusable pieces flat on a clean, level surface. Keep them out of direct sunlight and away from heavy objects. Label the panels so you can identify their original locations.
If the siding is too damaged to reuse, separate it from other renovation waste and check local disposal options.
How to Dispose of Old Vinyl Siding:
After a siding project, you may have a large volume of bulky panels, trim, nails, and packaging. First, estimate the amount of waste and keep reusable materials separate.
If you are researching how to dispose of old vinyl siding, contact the receiving facility before loading your vehicle. Ask whether it accepts vinyl siding, whether sorting is required, and what fees apply. Do not assume every recycling depot accepts this material.
For local vinyl siding disposal in Vancouver, check the current facility rules and available options. Metro Vancouver provides resources for construction and demolition waste, reuse, and recycling. Local requirements can vary, so confirm before transporting a load.
If you would rather not handle the debris yourself, Trash Bandits can help arrange siding removal and haul away as part of a renovation clean-up. Our construction debris removal service can help manage suitable project waste. For construction debris removal in Vancouver, review the service details before booking.
Related Renovation Waste Removal Services in Vancouver and Nearby Areas :
The same applies if your project creates drywall or other renovation waste. See our drywall removal service and check our junk removal pricing to understand available options. If you need renovation debris removal in Vancouver, ask about the materials and volume involved. You can also review what can’t be thrown away in Vancouver before arranging disposal.
Homeowners looking for junk removal in Burnaby or junk removal in Richmond can check the relevant service-area pages. For larger projects, confirm what the crew can accept and whether separate handling is needed. Our renovation debris removal options can help make the clean-up easier.
Frequently Asked Questions:
Can I Remove Vinyl Siding Myself?
Yes. A homeowner with suitable tools and safe access can remove ordinary vinyl panels. However, extensive removal, high walls, hidden damage, or suspected hazardous materials call for professional help.
What Is the Easiest Way to Remove Vinyl Siding?
Use a zip tool to unlock the panel seam, remove the nails, and lower the panel carefully. Working in the correct order helps prevent unnecessary breakage.
Do I Need a Special Tool to Remove Vinyl Siding?
A siding removal tool, often called a zip tool, makes it much easier to release the interlocking edges. A pry bar and nail puller are also useful.
Can Vinyl Siding Be Removed Without Damaging It?
Yes, if the panels are in good condition and you release their locks and fasteners carefully. Old or cold vinyl may crack even when handled gently.
How Long Does It Take to Remove Vinyl Siding?
The time depends on the wall size, panel condition, access, and whether trim also needs removal. A small section may take less than an hour, while a full exterior can take considerably longer.
Can You Reinstall Vinyl Siding After Removing It?
Yes. Reinstall panels only if their edges, locking channels, and nail slots remain intact. Replace pieces that are cracked, warped, or too brittle to secure properly.
Conclusion
Knowing how to remove vinyl siding starts with understanding how the panels lock together. Use the right tool, remove fasteners before pulling panels away, and inspect the exposed wall for moisture or damage. Set reusable pieces aside and check local disposal requirements for the rest.
If your project leaves behind bulky siding and renovation waste, Trash Bandits can help with suitable debris haul-away. Explore construction debris removal in Vancouver, review the options for junk removal pricing, or arrange a book a free estimate request. You can also check our drywall removal service and local junk removal in Burnaby and junk removal in Richmond pages. Before booking, confirm material acceptance and project details, then book a free estimate.